In today’s interconnected world, managing your digital presence even when you’re not available is crucial. One such aspect of digital management is handling emails during absences. This guide delves into setting up out-of-office (OOF) replies in the Outlook app, ensuring that your contacts are informed of your unavailability, thus maintaining communication continuity.
Understanding Out-of-Office Replies in Outlook
Out-of-Office replies in Outlook are automatic responses sent to individuals who email you while you’re away. Whether you’re using Outlook for Windows, on a mobile device, or any other platform, activating this feature is a straightforward process that informs senders of your current unavailability and when they can expect a response.
Setting Up OOF in Outlook for Windows
The procedure varies slightly depending on your version of Outlook, but here’s a simplified guide applicable to most:
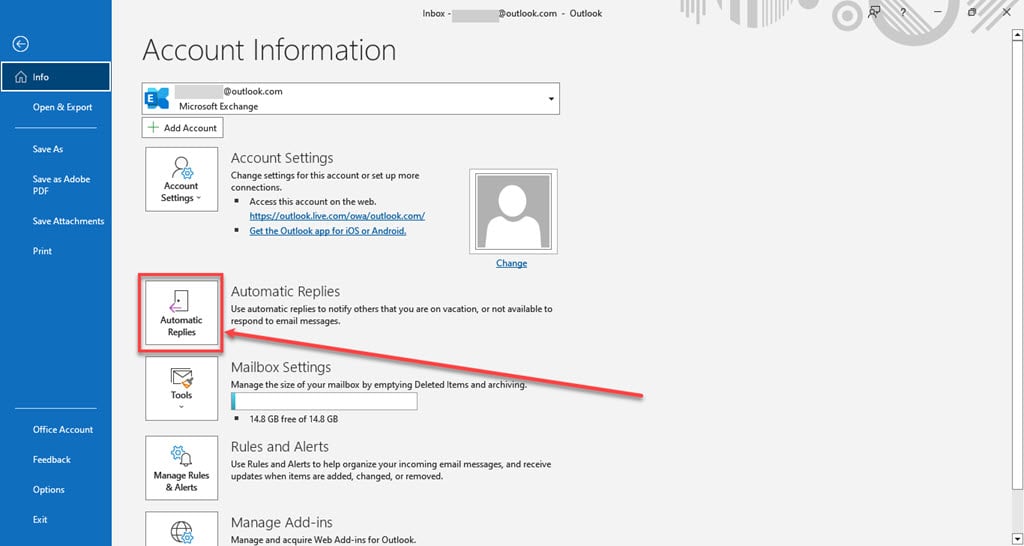
- Access Automatic Replies: Open Outlook and navigate to the File tab. Select ‘Automatic Replies’ to initiate the setup.
- Activate and Schedule: Enable ‘Send automatic replies’ and specify the start and end times if you wish the replies to be time-bound.
- Craft Your Message: Write a personalized message that will be sent to internal (within your organization) senders. Formatting tools are available to align text, adjust color, and emphasize parts of your message.
- External Replies: If needed, activate and craft a separate message for senders outside your organization.
- Save: Finalize your settings by clicking ‘Save.’
Enabling OOF on Mobile Devices
If you’re away from your desk but need to activate OOF messages, the Outlook mobile app has you covered:
- Open the Outlook App: Start by launching the Outlook app on your device.
- Navigate to Settings: Tap on the app icon, then the Settings gear.
- Select the Account: Choose the mail account you wish to set up OOF replies for.
- Toggle On ‘Automatic Replies’: Enable the feature and specify if the replies should be sent during a specific time period.
- Compose Your Message: Enter your OOF message and save the settings.
Key Considerations
While setting up OOF replies, remember to:
- Tailor your messages to suit the tone and expectations of your audience.
- Update your return date in the OOF message if your plans change.
- Deactivate the OOF setting upon returning to avoid confusion.
Wrap-Up Thoughts: Your Digital Presence Managed
Managing your digital correspondence effectively, even when you’re not actively engaged, is a critical aspect of modern professionalism. By setting up OOF replies in Outlook, you ensure that your absence doesn’t disrupt your workflow or communication with your contacts.
Frequently Asked Questions
- Can I set up OOF replies in any version of Outlook?
Yes, though the steps might vary slightly, the feature is available across all versions. - Should I use a different message for internal and external senders?
It’s advisable, as the tone and content might need to be adjusted based on the audience. - Can I specify the duration for the automatic replies?
Absolutely. Outlook allows you to set start and end times for the OOF replies. - What happens if I forget to deactivate OOF replies?
Your contacts will continue receiving your OOF message until you manually turn it off. - Is it possible to set up OOF replies from the mobile app?
Yes, the Outlook mobile app supports setting up OOF replies directly from your phone.